
How to Create a Scampage
Anatomy of a Phisher
Before we dive deep into creating your own phisher you need to understand what makes these things work. A phisher is essentially split into two critical components—think of it like a digital mullet: business in the front party in the back.
Frontend (The Pretty Face):
This is what your marks actually see—the login page input fields logos and all that eye candy. It's a carbon copy of the legitimate site you're targeting right down to the favicon. The frontend needs to be pixel-perfect because humans are surprisingly good at spotting when somethings off even if they can't explain why. One misaligned button or wrong font and your conversion rate (the number of people who actually input their info) goes to shit.
Backend (The Money Maker):
This is where the magic happens. Instead of storing data in a database were going to use a Cloudflare Worker to capture form submissions and fire them off directly to your Telegram using a bot. Every time someone submits their creds you'll get an instant alert on Telegram. It's simple and cost-effective and keeps you in the loop in real time.
The beauty of understanding these two components is that you can mix and match them like building blocks. Once you master creating both parts you can adapt to any target site fast. Hell you can even run multiple frontends—different banks email providers whatever—all feeding into a single backend. It's efficient as fuck and lets you scale your operation without rebuilding everything from scratch. And that's exactly what we're going to learn.
Crafting the Frontend
Time to build the “pretty face”—the frontend. For this demo we’re going to cl*ne CapitalOne. Why CapitalOne? Because banks are mostly what you will be using these phishers for and the CapitalOne login page is a perfect place to start practicing your skills. Don't worry once you nail this you can rip off any site you want—banks e-commerce you name it.
Step 1: Stealing CapitalOne Face

Remember we are not coding this from scratch like some script kiddie. We’re digital bandits not web developers. Go download that Chrome extension called "SingleFile". This little gem lets you take an entire webpage—HTML CSS images the whole damn enchilada—into one tidy HTML file. It’s like ripping off a band-aid but for websites.
Step 2: Snag the Login Page
Head over to CapitalOne secure shopping page: Capital One Sign In: Log in to access your accounts Yeah thats the one. Click that SingleFile extension icon in your browser. Boom. Just like that you downloaded the whole page.
Step 3: Rename and Save
Rename that fresh off file to index.html. It’s the first page they look for when you open a website. Save it somewhere you can actually find it later.
Step 4: Quick n Dirty Edit (For Now)
Crack open that index.html file in a text editor like VS Code, Sublime Text or Notepad++. We need to make sure this frontend actually works before getting fancy with the backend
Pop it open in your browser first—does it look like the real CapitalOne login page? If not you f’d up the SingleFile step. Go back and try again until it looks legit.
Now for a quick test setup. Head to webhook.site and grab a webhook URL—this'll be our temporary data catcher. Find the <form> tag in your HTML and change it to webhoattribute to your webhook URL. This makes form submissions go to webhook.site instead of CapitalOne's servers.
Next find the username and password input fields (they'll be <input> tags). Add name="username" to the username field and head to webhook.to the password field. These tells the browser to pass the data. Different sites use different names, so you’ll need to adjust this for each target. But they all use more often than not a single form element.
That's it for testing. Open your page enter some fake login details and hit submit. If the data shows up on webhook.site your frontend is working. If not double-check your edits and try again. Once its working you're ready to set up a real backend.
Setting up the Backend
Now for the brains of the operation—the backend. Instead of using a database we're using [Cloudflare Workers[(https://workers.cloudflare.com/) to instantly forward captured credentials to your Telegram account via a bot script. This is not only cost-effective but also gives you immediate alerts whenever someone submits their info.
Step 1: Cloudflare Account
Head over to Cloudflare and create a free account. This isn’t optional. We’re using Cloudflare for everything—the backend and the frontend. You need to set it up before you can start cooking. So get to it.
Step 2: Set Up Your Telegram Bot
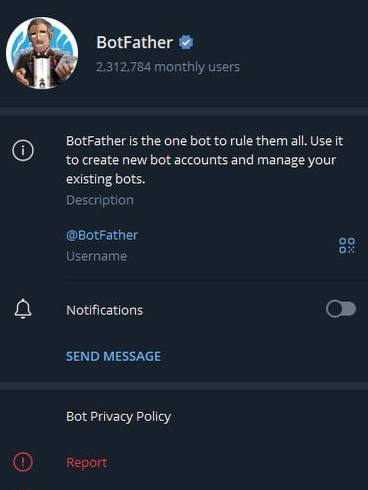
First create your Telegram bot by messaging @BotFather on Telegram. Type /newbot and follow his prompts to name your bot. BotFather will spit out an API token that looks like this: 63xxxxxx71:AAFoxxxxn0hwA-2TVSxxxNf4c. Save this —you’ll need it.
Now for your chat ID. Heres how to get it:
- Search for your new bot in Telegram and send it a message (just "/start" works)
- Take your bot token and plug it into this URL: `https://api.telegram.org/bot{YOUR_BOT_TOKEN}/getUpdates` (Replace {YOUR_BOT_TOKEN} with the actual token keeping "bot" in front)
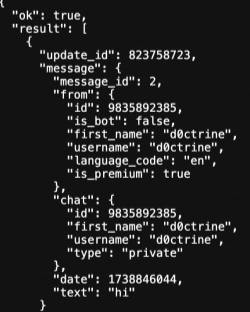
- Open that URL in your browser. Youll see a JSON response with your chat details. Look foro this URL: `https://api.tele- that number is your chat ID.
To verify everythings working:
Try sending a test message by visiting: (just "/start" works)
- Take your bot token and plug it into this URL: `https://api.telegram.o Check if you see the message "test123" pop up in your bot chat youre golden. If not double-check your token and chat ID.
Worker Code.js948 B · Download
Step 3: Cloudflare Worker Time
Now go to "Workers" in your Cloudflare dashboard and create a new Worker. Cloudflare provides an online code editor. Don't panic—we’re not writing a novel here. Paste the following code in the file into your Worker
Step 4: Test Your Cloudflare Worker
Now its time to test your new backend. First go back to your scampages HTML form and replace the webhook.site URL with your Cloudflare Worker URL (it should look something like "your-worker.your-subdomain.workers.dev").
Once thats done test the full flow:
-Open your scampage with Chrome -Fill in some fake credentials -Hit submit
If everything is set up correctly you should receive a Telegram message with those test credentials.
Step 5: Deploy Your Scampage
Now for the final piece - getting your phisher live on Cloudflare Pages. This gives you a slick professional-looking domain and worldwide CDN distribution.
- Head to the Pages section of your Cloudflare dashboard - Click "Create a project" - Choose "Direct Upload" Either: - Create a ZIP file containing just your index.html - Or create an empty folder put your index.html inside it - Drag and drop your file/folder into the upload area - Give your project a name (this will be part of your URL) - Hit Deploy
Within seconds Cloudflare will provision your phisher at your-project.pages.dev serving it over HTTPS to look legit asf. Your vic won't see any sketchy redirects or SSL warnings - just a clean professional-looking page served directly from Cloudflare's infrastructure. And since it's running on legitimate Cloudflare infrastructure it'll slap right past most basic security scanners. But remember this is just the foundation - there's a whole world of advanced techniques and optimizations waiting for you to explore.
Connect
New posts, drops, and announcements land here first. Join and the bot notifies you the moment they go live.